
The Runs Sheet allows you great flexibility to execute a single run, all the way up to thousands by uploading a CSV/XLS file in a familiar spreadsheet-like interface.
To use the runs sheet for one or a handful of runs, click the purple “New Row” button in the top right.

This will create a new row where you can input data to begin a run.

Type your data inputs into the medium-purple boxes and click the Play button to initiate a run of your workflow. You can also run multiple rows this way by clicking New Row as many times as you need and inputing data into the appropriate cells. You can even copy/paste from a spreadsheet like you normally would.
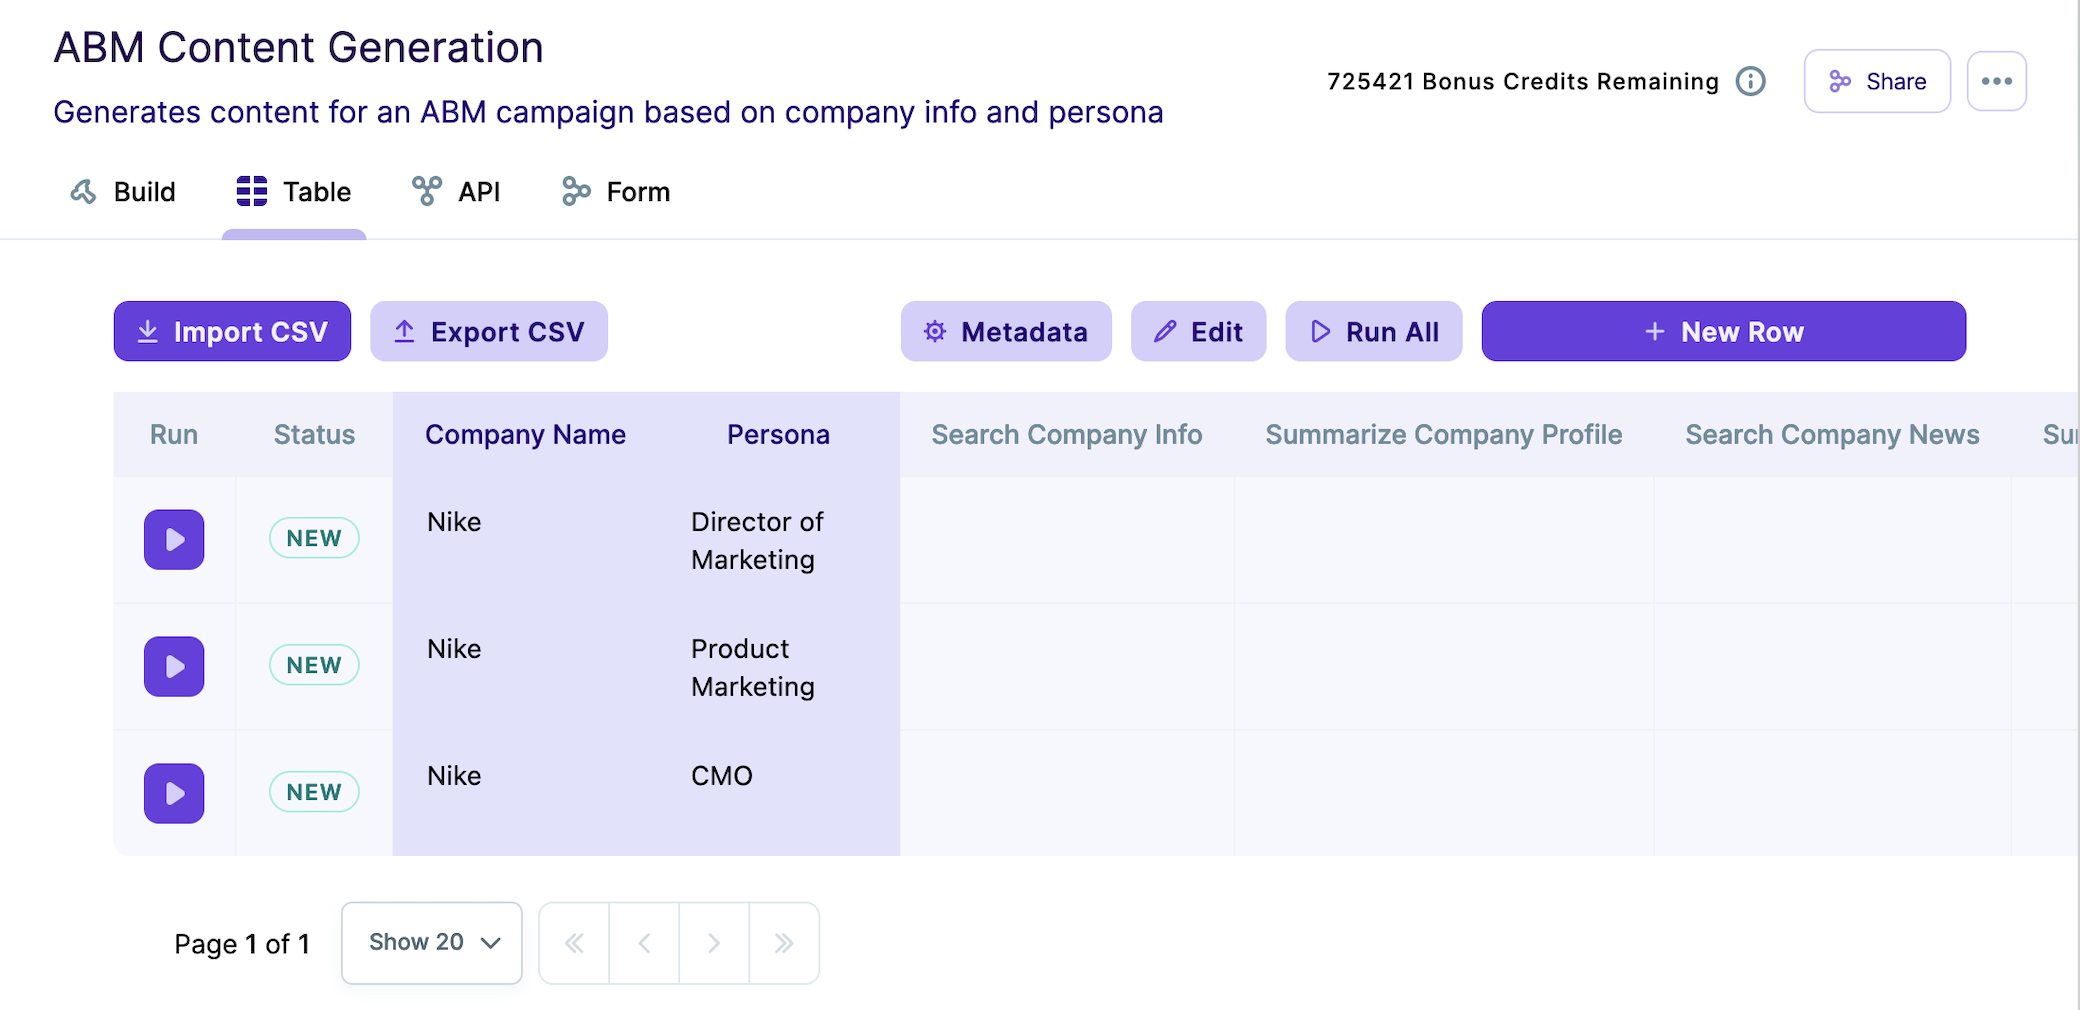
If you have multiple rows, you can also click the “Run All” button next to the “New Row” button and kick off any row that has data and a status of “NEW”.

Uploading a CSV/XLS File for Bulk Runs
Let’s say you are running an ABM campaign and have 1000 target accounts, and in those 1000 target accounts you have 5 Personas you want to generate content for. You could build a workflow like the ones in the examples above to generate all the necessary content for each combination of Company and Persona, but clicking the “New Row” button 5000 times doesn’t sound like an ideal way to spend your day/week.
To execute this workflow at that scale, you can upload a spreadsheet by clicking the “Import CSV” button on the top-left.

This begins a Wizard-like process. The first step is to upload your file by either dropping it into directly into the uploader, or clicking it and selecting the file you wish to upload that way.

The second step is to select the header row of the spreadsheet. The first row is auto-selected as that is most common, but if you have other information in the first rows and your actual header row is further down, find it and select. When you are finished, click the blue “Next” button on the bottom-right.

The third step is to map your columns in the CSV/XLS file to the input columns of the workflow. On the left you will see the column names from the file you uploaded as well as some sample data from those columns, now represented as rows.
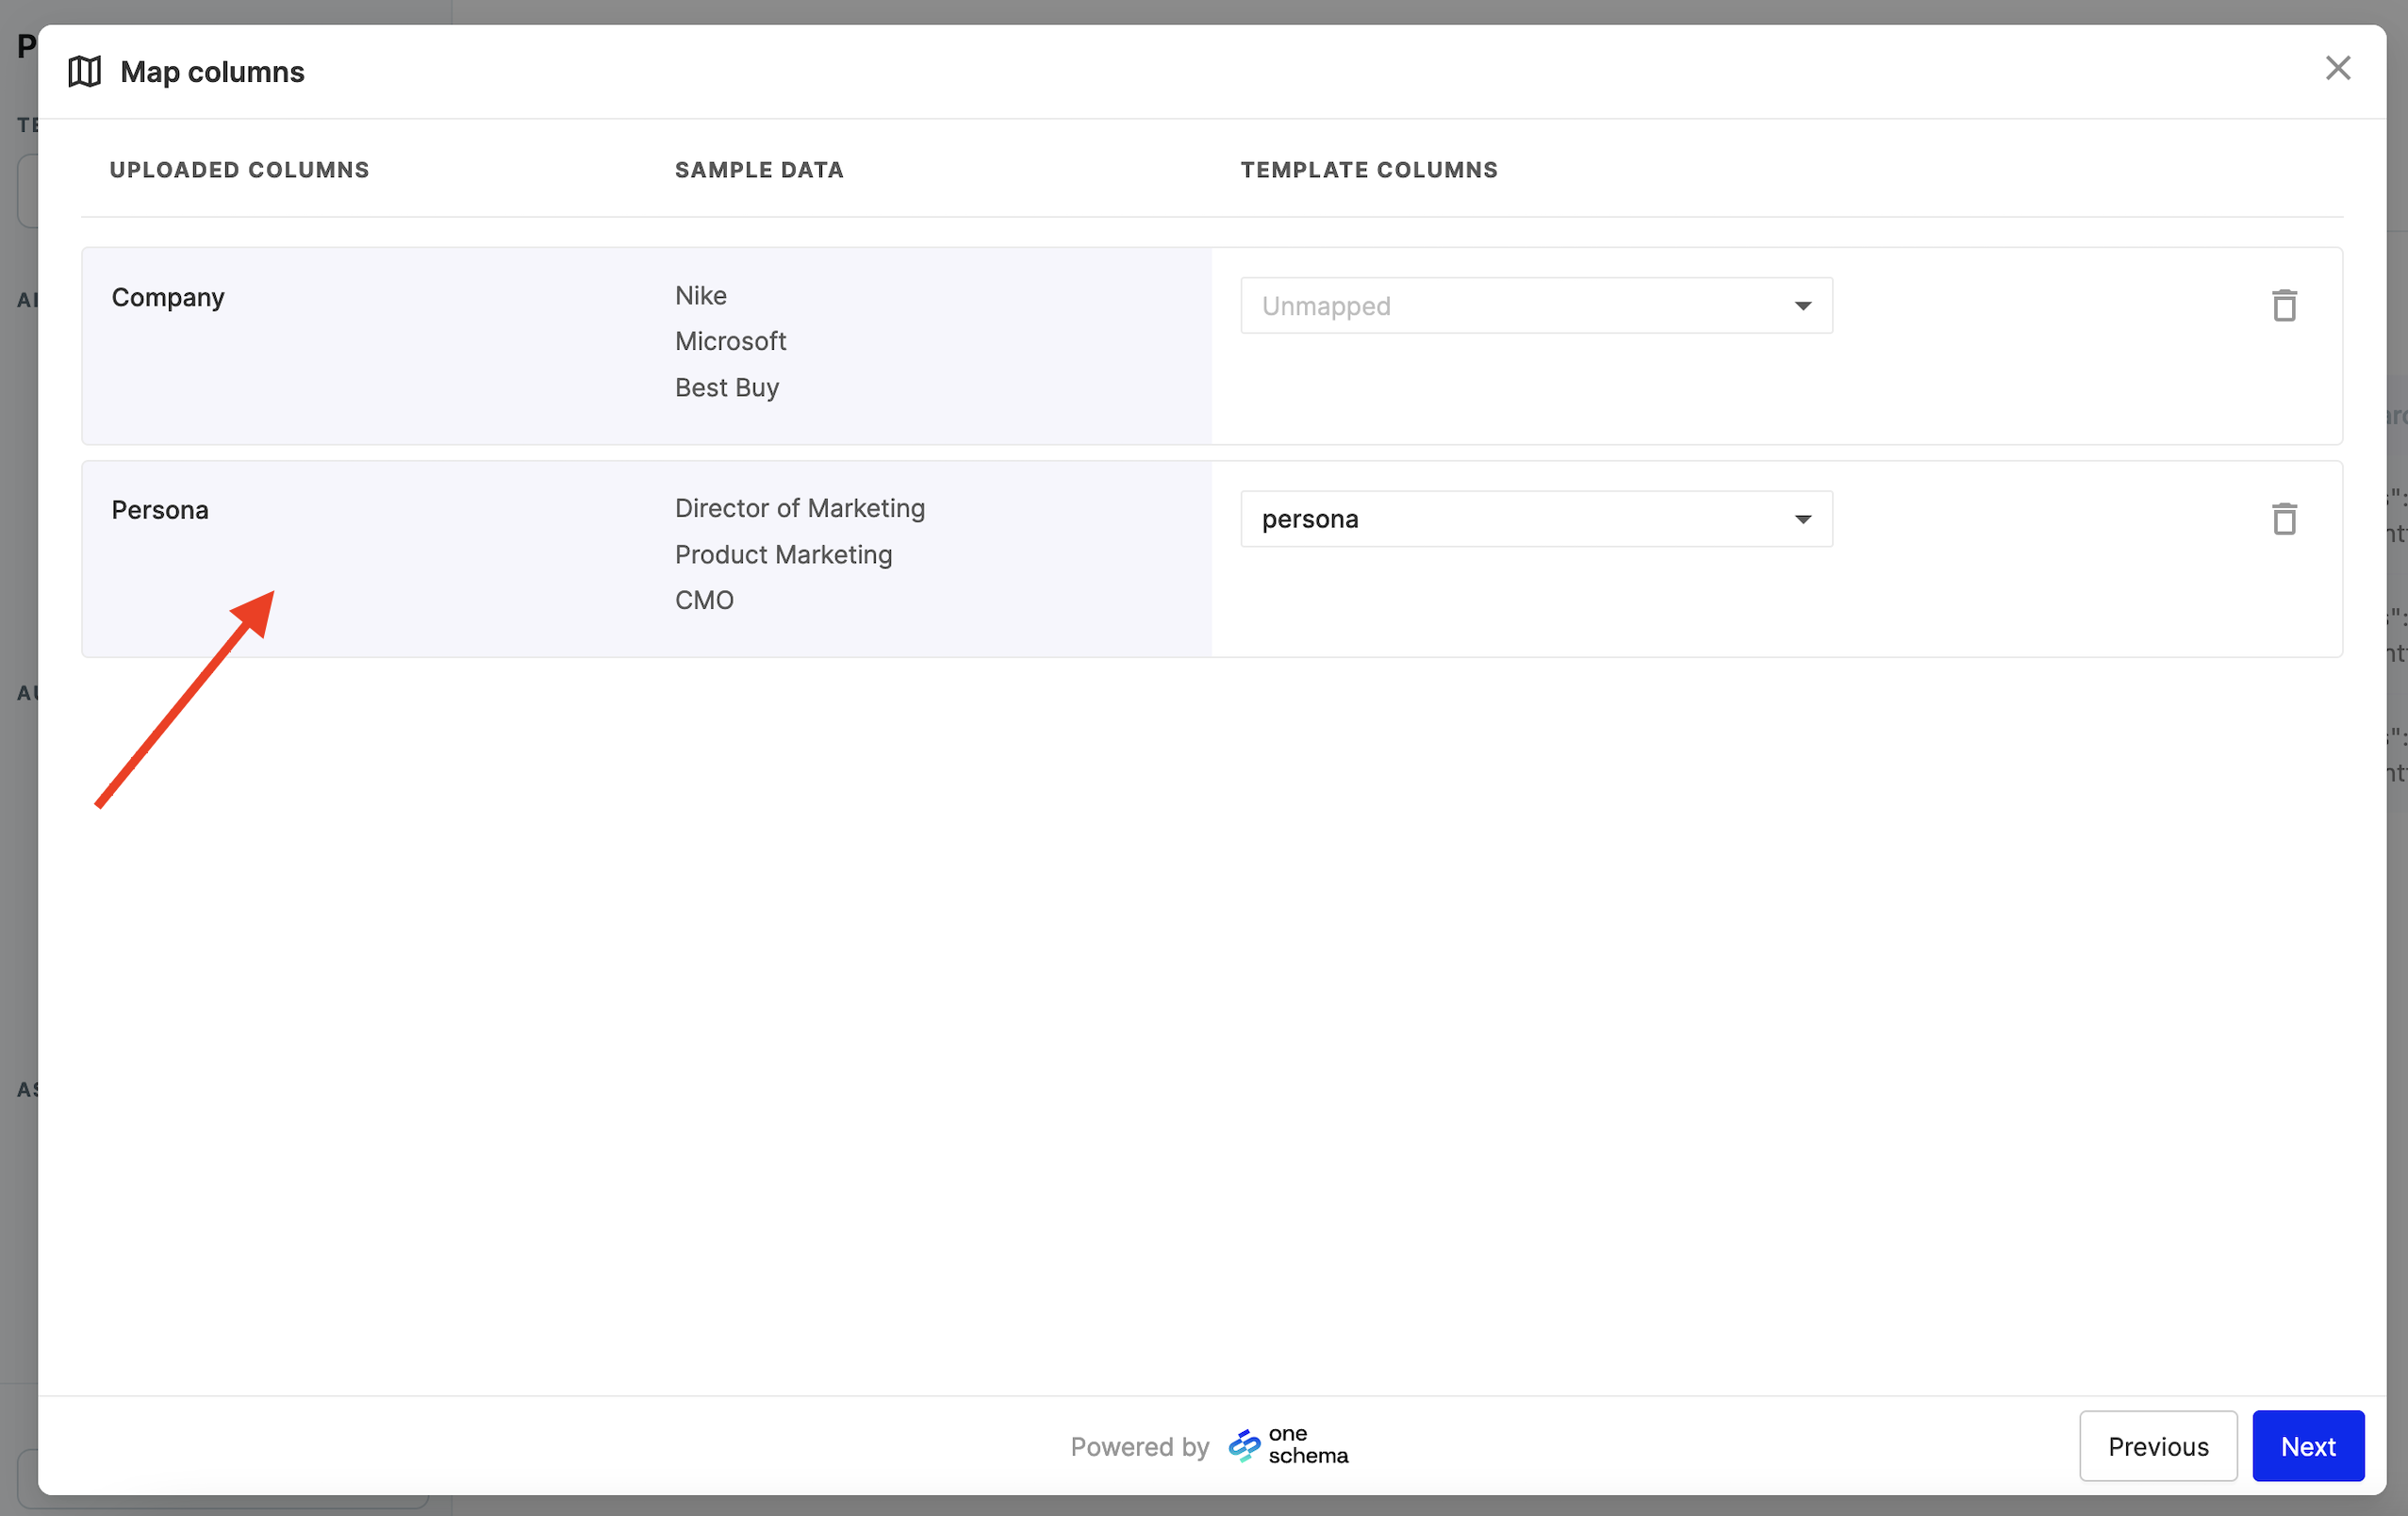
Under the “Template Columns” Column is where you would select which Workflow inputs those columns belong to. If your file has a column that shares a name with an input in the Workflow, they will be automatically mapped. If not, you will have to manually map the column. In this example “persona” was automatically mapped, but “company_name” had to be manually mapped.

Once this is complete, click the blue “Next” button on the bottom-right.
Step four is to review the mappings before importing the data to the Workflow Runs Sheet.

Here you will see any rows that have issues, and you can delete rows as well by click the checkbox to the left of the row you wish to delete and clicking “Delete”.

Once everything looks good, click the blue “Import” button on the bottom-right and your data will be added to the Runs Sheet.
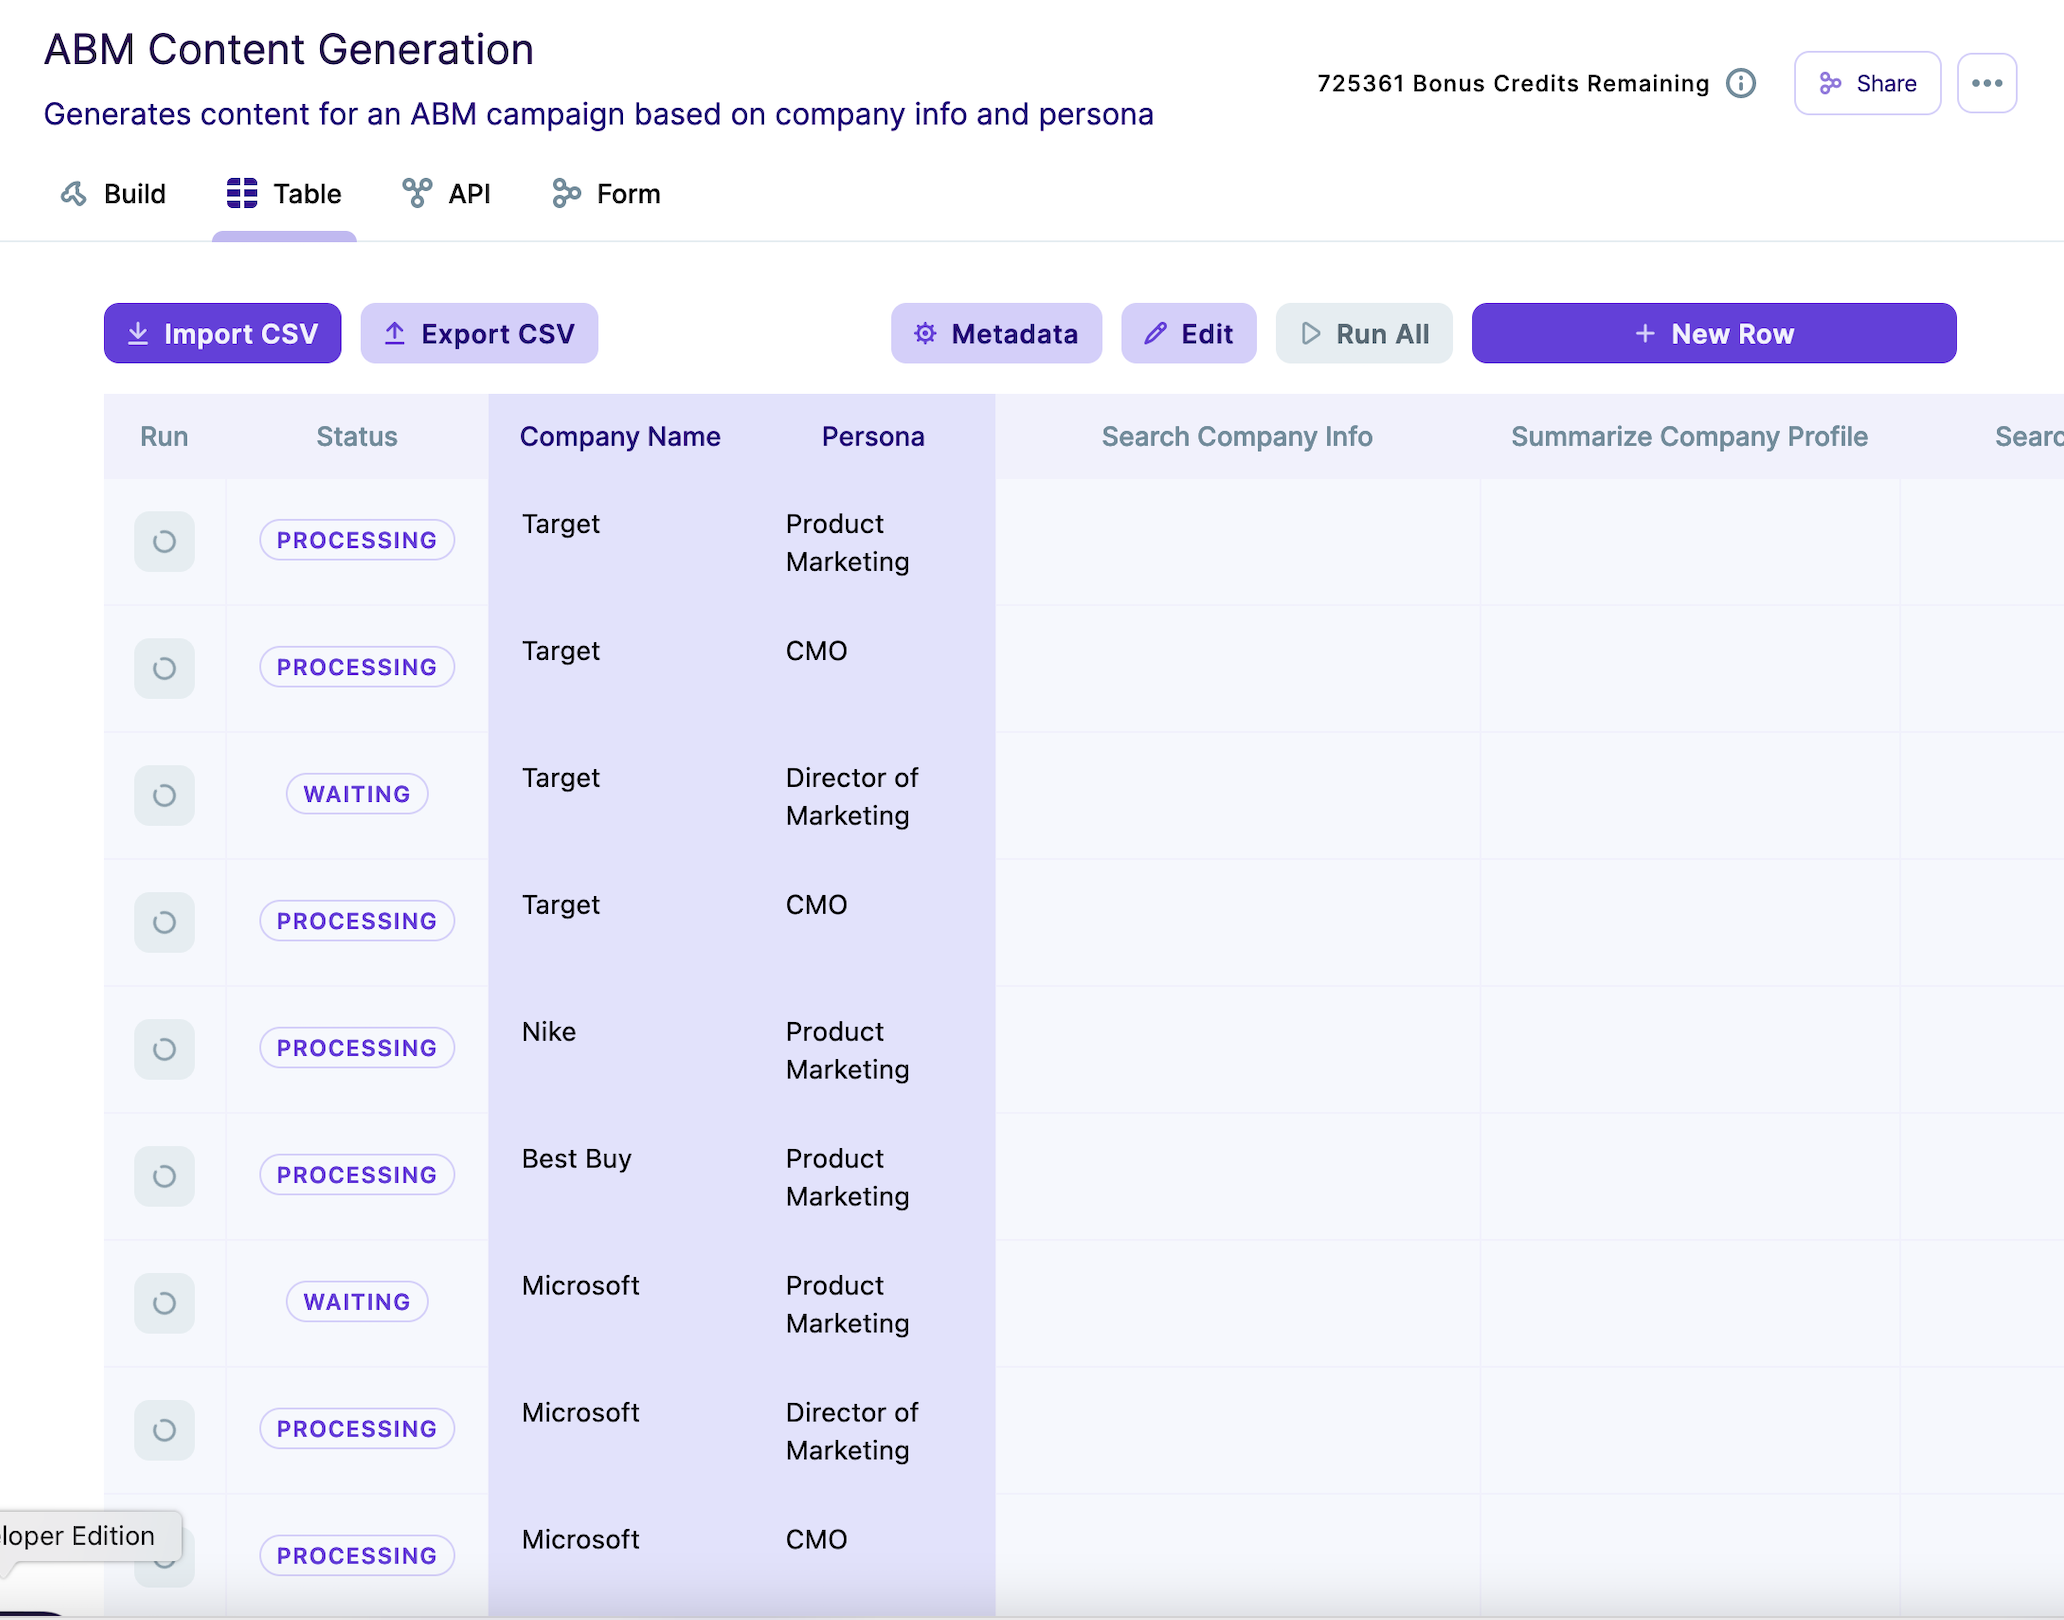
Step five is to click the “Run All” button.

This will queue up all of the newly uploaded rows. They will not all necessarily run in parallel. Each account has a concurrency limit which if exceeded all runs will remain in the queue and wait for there to be room before beginning to run. This means it can take some time to complete all runs so go enjoy a cup of coffee.
Once the runs are complete, you can click the “Export CSV” button to download a new spreadsheet that includes all of your results.

In the API section, you can learn about setting up Webhooks to be automatically notified when a run is completed (or failed). This can even allow you to set up automations where you would upload a CSV/XLS of data, but automatically update another system with the completed workflow data when it’s ready. In this case, we could add the landing pages to our CMS, our custom emails to our CRM, our ads to their respective tools, etc. Our Zapier App can also make this even easier to connect Copy.ai with thousands of other tools in a low/no-code fashion.
